Wednesday, February 24, 2010

Skew U


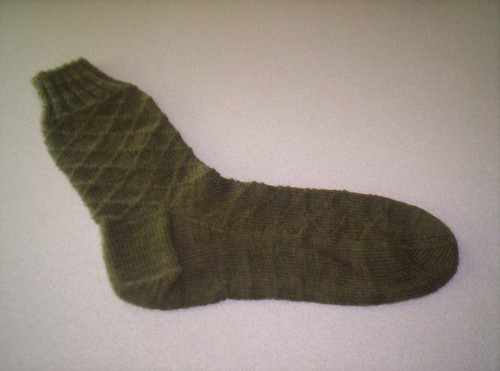
It's been two weeks since Knitty.com released Skew as a mid-Winter Surprise, and I've been ecstatic about its generally-positive reception. I know that no sock construction can be ideal for every foot, but of course I want the Skew sockitecture so suit as many feet as possible, so I've been working madly on fit modifications. Here's what I've come up with so far.

  • Higher instep: In the first row of the "Inner ankle" section, increase six times on the sole of the foot. Explicitly: for the left sock, when 25 stitches remain in the round, work (k1, RLinc, k1) 6 times, k 10, SSK, k1. I bet you can generalize for the right sock. :) Then, when you work the first round of the "Heel shaping: Left sock only" section, k 13 instead of k 10. The Kitchener-stitched section in the Origami Moment will have 18 stitches instead of 15.

  • Roomier legs: The double decreases in the "Decrease mini-gusset" section serve two purposes. First, they remove the stitches introduced on the top of the leg in the "Increase mini-gusset" section; and second, they shift the structural line on the outer ankle forward. In order to accomplish the second objective without removing stitches, I suggest that you work only three double decreases (instead of six) in the
    "Decrease mini-gusset" section, but omit the opposing decreases (SSK near end of round on the left leg; k2tog near beginning of round on the right leg) on alternate rounds. The result is 78 leg stitches instead of 72. You will need to work an extra set of short rows on the leg before the ribbing.

  • Thinner legs/ankles: Try eliminating the increases on either side of the first ankle marker (for the left leg) during the "Inner Ankle" section on every fourth round, three times. The result is 66 leg stitches instead of 72. You will need to work one fewer set of short rows on the leg before the ribbing.

  • Roomier heel back: Several knitters have expressed frustration at the snugness of the band at the upper back of the heel. I admit this requires a little wiggling to pull on, but for me, the fit once the sock is on is exceptional. For many feet, the high-instep mods described above will add sufficient wiggle room to pull on the socks. I've tried working additional rounds in the heel section, but the result was too much distortion in the leg (the outer leg vertical band ends up too far towards the back). I intend to try adding some short rows over the heel band, but haven't test-knitted it yet. Stay tuned.
  • Friday, February 12, 2010

    Further skewed

    I do plan to release a multi-size version of Skew later, but for the brave, I'm posting my notes on how to shape the heel for an 84-stitch foot. A talented friend successfully produced socks from these notes. If you need line-by-line instructions, I'm afraid you'll have to be be patient until the official version comes out.

    KNIT AT YOUR OWN RISK. I have not personally tested these numbers and can't provide "pattern" support.

    Cast on 8 stitches per needle, increase in the big toe section to 56 stitches, then to 84 in the mid-toe section.

    Inner ankle gusset (IAG) needs to create 42 sts for the back of the leg, which takes 42 rounds (21 shaping rounds separated by plain knit rounds). After 7 IAG shaping rounds (14 sts between IAG markers), start working mini-gusset shaping as for the 72-stitch version. After 14 IAG shaping rounds (28 sts between IAG markers), start the heel decreases.

    During the heel decreases, my notes say there should be 18 stitches between markers instead of the 15 for 72-st version-- so on left sock, replace "k 10" with "k 13."

    Thursday, February 11, 2010

    Skew

    My Skew sock has been published! It is one of the winter Knitty surprises. The waiting has been killing me.

    I'm short on time today (I'm prepping for a crochet scarf class tonight), but I promise to blog tomorrow with some notes on upsizing (and downsizing). Also, there is an error in the Big Toe section; I've put an errata note on the Ravelry pattern page, and will add the details here too shortly.

    Monday, December 07, 2009

    Adjunct Professor of Yarny Goodness

    I used to think I wanted to be a college professor. I went to grad school. I also dropped out of grad school. Twice. I got a master's degree in one subject, and embarked on a serious attempt at dissertation research in another. I married one man with a Ph.D., our housemate is another, and both are college professors. So although I realized that my personality was unsuitable for the tenure track, I'm fairly experienced with the culture of academia.

    Now that I'm designing with the intent of publication, I'm amused by the parallels between my work and academic life. At a recent coffee shop gathering, a friend asked me, "So what have you got going on these days?" Thinking of my upcoming submission deadlines, for which I'd done extensive knitting and crocheting but no proposal-writing, I said, "Well, you know how it's way more fun to do the research than to write the paper?" and everyone at the table, with one voice, said, "YES."

    Something important that is missing from my life is a good graduate student. I would gladly teach knitting and crochet arcana and provide grant funding (i.e., yarn from my stash) in return for winding my skeins, testing my instructions, and (of course) knitting my second socks.

    Sunday, November 15, 2009

    Barter for Garter

    Recently, a relatively new friend-- someone whom I like very much, but haven't really had time to develop a strong emotional bond with-- asked me, "So what does it take to get a pair of handknit socks?" I actually don't knit for very many other people. My gift knitting is pretty much limited to my husband, some (but not all!) of my family of origin, my in-laws, and my band. Very rarely, I'll knit for an extremely close friend. The list of people for whom I will knit for free looks suspiciously like the list of people for whom I would donate a kidney.

    I was thinking, though, that there is one way I would knit to order: in exchange for an equal amount of the recipient's time. If you're willing to labor at something you're good at for me, I'll do it for you. A pair of fine-gauge socks take about thirty hours, so start thinking. Here are a few ideas:

  • Like hanging out with cats? Take care of mine for a week, and I'll knit you a hat. There are seven of them (cats, not hats). If you'll come twice a day to supervise the one on a restricted diet and let the crazy outdoor-lover in and out, there's a matching scarf in it for you. House-sit and they'll be cashmere or silk.

  • Like landscape gardening? I've got at least a lace shawl's worth of that for you to do.

  • Like cabinet-making? There may be an entire intricately-cabled Aran pullover in your future. If you are an experienced kitchen or bath remodeler, we can talk fair isle.
  • Of course, if I simply don't like the pattern or the yarn you want knitted, all bets are off. So if you want a black acrylic cabled sweater, I don't care if we share DNA, exchange vows, or play rock 'n roll, you're still out of luck.

    Thursday, September 03, 2009

    A work injury

    See what happens when I knit other people's pattern's instead of working on my original designs? This is the front leg detail from Cookie A's "Stricken" sock pattern. I didn't have enough yarn to finish the toe, but a kind person from Ravelry sent me some. First, however, I need to rip and re-knit the foot due to a gauge anomaly. Again.


    However, I purled through the back loop too often and crossed too many twisted knits, and this happened.
    That's my tennis elbow support band. All right, no more twisted stitches for me for a while. Back to stockinette for the moment.

    Tuesday, September 01, 2009

    Minimum summer moment

    It's been quite a summer. I've been working almost entirely on designing and have two sock designs in submission, one in preparation for self-publishing for sale, and a fourth on the needles to self-publish for free download (you know you want it!). Whew. All that design work doesn't make for much blogging, as you can see, since most publications want you to keep your projects under wraps until the release date.

    I went to Knitter's Connection and spent two days of class with my awesome friend Peg and the inspiring Cat Bordhi. She liked the design work I brought with me, which made me deliriously happy and kicked off my designing frenzy. You'll see that sock one of these days. I can't tell you where and when, but you'll see it.

    castle fibers
    I was fairly restrained in shopping, but I did come home with yummy stuff from a new-to-me company, Castle Fibers. I wish I'd bought more. They have an etsy store but there's nothing like picking it out in person. Later I found out an amusing factoid: they are based in Rapid City, SD, which is the town where I was born.

    It took me two days of misery to get there, but I did eventually make it to Sock Summit in Portland. I had to rush straight from the airport to Amy Singer's "Making the Next Monkey" class, and still missed half of it, but Amy invited me to attend the first half of the other session to catch what I had missed (thanks Amy, you rock!). I'm feeling much better (or at least better-educated) about doing my own sock photo shoots for Knitty submissions now.

    I spent an incredible amount of time in the Sock Summit marketplace. (I swear it would have been cheaper if I'd gotten into more classes!) I met Casey and Mary-Heather in the marketplace, and did the fangirl routine (Yes, Casey,I'm the dork who gushed profusely about your beautiful programming). He gave me a Ravelry button! After embarrassing myself soundly, I didn't have the nerve to say hello to Cookie A. I didn't make it to Voodoo Doughnut (smelled the doughnuts, saw the line, kept walking) but I did have a root beer cupcake from Cupcake Jones. They have mocha almond fudge cupcakes today and I WANT ONE.

    Oh, uh, and I've been in the throes of moving to a different house. In my spare time. Riiiiight. I got my old house sufficiently (not entirely) emptied and fixed up to put on the market within SIX WEEKS of deciding to sell. It was a monumental, stress-inducing, sleep-depriving endeavor. Well, at least there's more room for yarn in the new place, even if there is an appalling lack of closet space.

    Thursday, June 11, 2009

    When I'm high, I can knit the future

    My husband the number theorist goes to conferences which are well-attended by people who do mathematics for the National Security Agency. Many of them will tell you they really enjoy their work, but they can never give any talks about it. That's how I feel about working on my sock design; I'm having a grand time, but it doesn't make for interesting blogging.

    When I say "grand time," it actually reminds me a lot of taking narcotics. I'm hyper, euphoric, insomniac, and just a little nauseous.

    I'm on my fourth iteration of the heel. The first time was like a rough draft, just to see how the pieces fit together. Then I did a whole bunch of high school algebra to figure out the numerical relationships between the stitches and rows of the various sections. I also demonstrated that there was only one degree of freedom, which means that it's okay to pick the number of inner ankle gusset increases to be anything I want, but then all the other numbers are determined by that one (no more free choice).

    While I was knitting up the Math on a Recycled Envelope, I tweaked the construction details, substituting kitchener stitch for a section of narrow short rows, which produced satisfactorily stretch and mysterious-looking ("How'd you do that?") heel, so now I'm just tweaking the fit.

    I have to knock off the tweaking pretty soon, though, because in seven days I'm leaving for Knitter's Connection! My friend Peg and I had some headaches with registration, but in the end, we are both taking two whole days of class with Cat Bordhi. It's important to me to have a finished sock with me, not a pile of sock ramen and a better idea.

    Oh, and because blogs should have photos, here's one of a famous number theorist. Does his shirt say "Kaffe Fassett influenced" to anyone but me?

    Monday, June 01, 2009

    Seventeen days and counting

    So it's immediately obvious that this is a useful tool for creating an unconventional sock architecture, right?

    sock aid

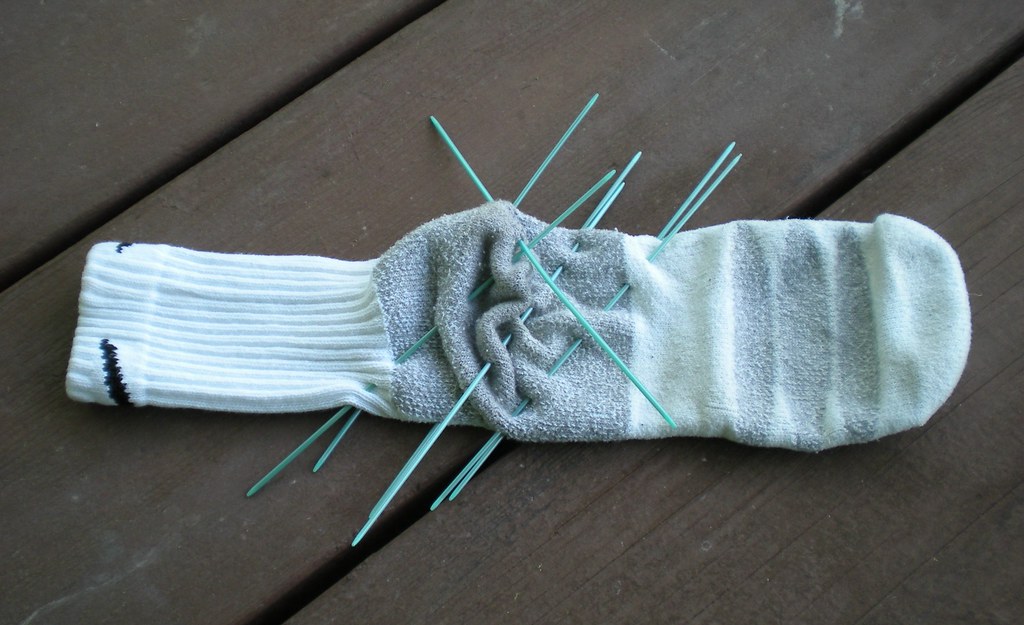
    I'd had a creative inspiration for sock architecture several months ago, but I never figured out quite how to work the heel. Last night while I was trying to fall asleep, I suddenly had an idea about how to go about solving the problem: mark up an actual sock! The house was dark and my husband was asleep already, but luckily there was a load of whites wrinkling in the dryer, so I fished out one of his white socks. Sadly, there wasn't one with an incipient hole, and I grudgingly admitted to myself that I ought not to draw all over a perfectly good one with a laundry marker. So I used double pointed needles to mark parallel lines to help me figure out where to place heel shaping elements. Then I stayed up way too late knitting on my prototype.

    I'm taking (hopefully-- still waiting for confirmation) a class with Cat Bordhi in seventeen days, and I'd love to have this prototype completed to take with me to show off. I can't post a photo of the WIP because that might interfere with submitting the design for publication, but I'll share a closeup of the yarn knitted up because it's Ooh Pretty. It's a Claudia Hand Painted Oops, which is a shame because I'd be tempted to buy more of it.

    sock sample

    Saturday, May 30, 2009

    The right tool for the job

    Okay. It's time to break down and spend the money on a pair of sock blockers for photography purposes. How do I know? Because I just took a photo of a sock with a cheese grater inside it.

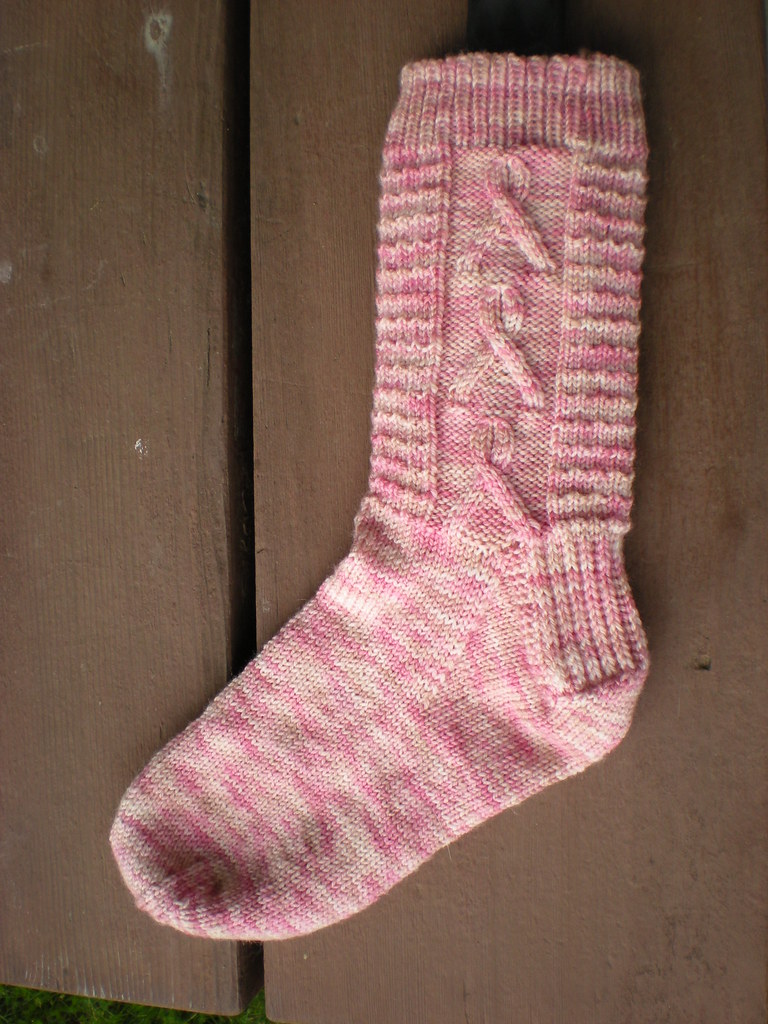
    Sock for the Cure

    At least that photo turned out better than the one of a sock with the DVD remote control in it.

    If you like the waffle texture on the non-ribboned portion of the cuffs, it's ridiculously easy: Knit 3 rounds, then work (K1, P1) rib on the 4th. The original pattern called for seed stitch, but that sounded like way to much purling.

    Thursday, May 21, 2009

    Technical difficulties and things that are pink

    When I tried to photograph my latest stockinette sock, I ran into a problem. The pictures turned out fuzzy.

    miranda helps

    sock saddle

    I promise I've got the second sock on needles already. Casting it on immediately isn't a surefire cure for second sock syndrome, but at least it keeps me from using the right set of needles in some other project, stalling out the second sock indefinitely. In fact, there is a solo sock on my coffee table right now as a result of the last time I failed to segue directly to the second sock; I robbed the needles for the purple ankle socks instead.

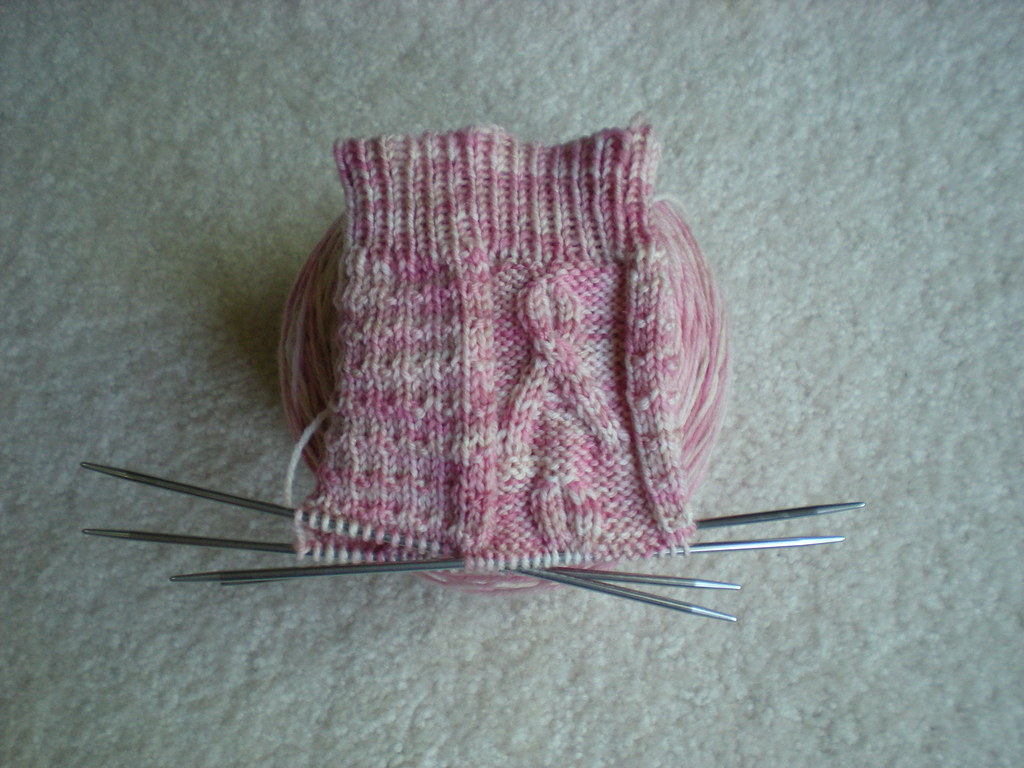
    At least I've managed to cast on a non-stockinette sock. It's a charity project; I plan to donate the finished pair for the local Race for the Cure raffle in the fall.

    sock for the cure 2

    I'm using (by which I mean modifying) the Pink Ribbons: Breast Cancer Awareness Sock pattern by Lisa Lloyd, graciously distributed by her for free.

    Tuesday, May 19, 2009

    Two-pack

    I've been in a stockinette sock slump again lately. This time I was carved into that rut so deeply that I made four matching socks. They're all knit from one 100-gram ball of sock yarn (Opal Cotton).

    ankle socks 2-pack
    How did I know I had enough yarn left to knit a second pair of socks? I used my kitchen scale. I've got a good digital one that will measure in grams or ounces. When I finished the first pair, I popped the rest of the ball on the scale; since it still weighed 54 grams, I knew I had enough for a second pair. By the way, I would have run out of yarn if I hadn't made them fraternal quadruplets (they're not quite identical, since the subtle stripe pattern falls differently on each sock).

    A postal scale will also do nicely, and if you don't own a scale, all you have to do is stop by a post office with a self-serve scale in the lobby.

    Wednesday, February 04, 2009

    Six of Hearts

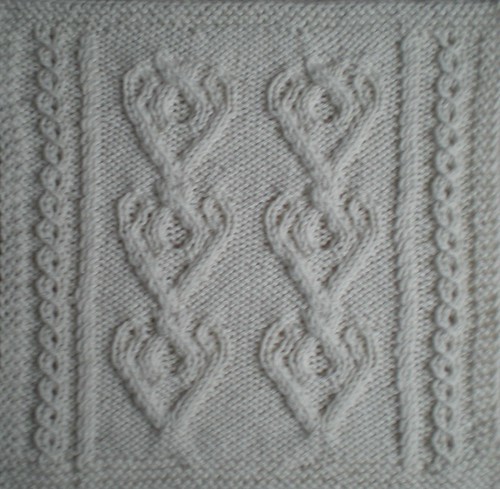
    I've finally managed to resuscitate my Great American Aran Afghan. In honor of Valentine's Day, may I present the recently-completed Barbara Selesnick square:

    Selesnick cropped

    This is supposed to be one of the five easiest squares. Well, sure, if you knit exactly according to the pattern. But when I tried that, it was going to come out ridiculously short; if I added a fourth vertical repeat at that gauge, it would have been too tall.

    I monkeyed around with several unsuccessful modifications, but in the end, I chose to add 4 rows of reverse stockinette to the center section before and after the heart motifs.

    Fidgety business: I worked the garter borders on 51 stitches instead of 55. I increased four stitches in the last row of the border, then increased another four stitches in the process of beginning the first hearts (two stitches at the base of each motif, bringing the stitch count to the expected 59 and successfully avoiding cable splay.

    By the way, here's Susan Rainey's interpretation of the Selesnick square with four pattern repeats.

    Monday, December 01, 2008

    Ravelry to the rescue

    A couple of months ago, I had an unhappy surprise at Afghan Sunday. I laid my completed blocks out on the floor and stood back to look them over - and saw that the Carol Adams square, which had been in the shop window for a while, had faded! Martha (the shop owner) was quite apologetic and offered to replace the yarn; but even using her secret underground shopowner connections, she was unable to locate another ball of off-white Cascade 220 Superwash from the same dye lot.

    Finally it occurred to me to post to the Ravelry group dedicated to the GAAA. After all, it has 450 members, and many of them are using the same yarn I am. And sure enough, within a few days, someone messaged me to report a sighting of the appropriate dye lot at her LYS! I phoned them right away and had them send me, not just one, but three balls. I should have enough yarn now to knit all 24 squares and the heavy cabled border if I want. Thanks very much, Heather (creativechick)! Also, thank you to the friendly, helpful staff of Knit-a-Bit in Westfield, NJ.

    Now what am I going to do with that non-matching Carol Adams square?

    Tuesday, November 04, 2008

    What Your Pattern Never Told You

    My mother is knitting garments! She's a multi-talented crafter who most recently has done miniature quilts and Native American-style beadwork. She's known how to knit (and crochet) for many years, and she let me teach her to knit socks after it became apparent that I couldn't produce them for her fast enough. But I haven't seen her make a sweater since I was a toddler (the red, white, and navy Fair Isle I wore to kindergarten is still around here somewhere, I think!).

    Mom's sweater knitting has reminded me of just how much information about finishing isn't included in the average pattern. Many important decisions that affect the ease and appearance of seams and other details are made, not during the sewing-up process, but during the knitting of the pieces. Here are three suggestions for preparing the pieces of conventionally-constructed sweaters so that you won't dread the sewing and will be proud of the result.

    Casting on: When you cast on for a piece that will later have a seam begin at its corner, leave a tail long enough to sew the seam. You'll have two fewer ends to weave in. How long a tail? For a mattress-stitched side seam, you need at least 1 1/2 times the length of the seam plus a tail to weave in. Err on the long side. To keep the long tail under control while you knit, wrap it around a bread tie (thanks to Lily Chin and the TV show Knitty Gritty for that hint!).

    Edge stitches: If the side edges of the piece you're working on will end up in a seam, or have stitches picked up along them, keep the stitches nearest each edge (called selvedge stitches) as plain as possible. Ideally, keep the two stitches at each edge in stockinette or reverse stockinette. Work decreases one or two stitches in from the edge. If you work increases at the edges, place each new stitch two stitches in from the edge. This is easy for "make one" increases because they are worked between stitches; however, for Kf&b increases, remember that the bump which becomes the new stitch falls to the left of the stitch in which you increase. In order for the bump to occur two stitches from the edge, increase in the second stitch at the beginning of the row but the third stitch from the end. If you're really fussy (or just adventurous), use the mirror-image to Kf&b that I describe in this earlier post; since this increase produces a new stitch to the right of the stitch in which it's worked, work it in the second-to-last stitch.

    New skeins: Begin a new skein only at the beginning of a row (unless you are splicing the ends together), so that you can weave the ends into a seam allowance later. Yes, this will waste a little yarn, but it's worth it. Be careful with the front pieces of cardigans which have knitted-in bands; join a new skein at a side edge, not a front edge.

    This'll get you started. Some other time we'll have to talk about short row shoulder shaping.

    Sunday, June 29, 2008

    It slipped my mind

    It's Afghan Sunday again and I've hardly touched the afghan in weeks, except to move the stack of finished squares around so the cat won't sleep on it. I did finish the Patt Tanton Hewitt square, which I was working on at the last meeting.

    Hewitt square

    I went down a needle size and this square still came out a smidge oversized (12-1/4”W x 12-1/2”H, after wet blocking). You can see it's a little taller than it is wide. It would have been even taller, except that I trimmed a few rows off. I ended the lower border with a RS inc row and then started the charts on Row 2 (instead of working a foundation row consisting of the last row of each chart, which would have meant two more rows). Correspondingly, I ended the patterned section with Row 2 of chart C, and incorporated the cables of Row 3 into the RS decrease row of the upper border.

    Fidgety business: I found that the M1P’s distorted the reverse stockinette too much, so I replaced each with a backwards loop cast on in the previous row. And in Row 25 of Chart C, just to be consistent, I replaced the SSK and K2tog by P2togs by borrowing a purl stitch from each neighboring panel.

    Here’s a hint I saw on Ravelry just after I finished: use two different-colored DPNs for the cable calisthenics. (By the way, Ravelry has a group devoted entirely to this project, and it's full of helpful and amusing people.) The tightness of the stitches while working those multi-strand cables made working this square physically tiring and hard on my wrists, but the high "ooh pretty" factor gives you a pretty high return on your investment.

    I've almost finished the Salazar square, too. Here's a shot of the center section; I've got the borders done and sewn on now. Maybe I'll finally wrap up the chain stitching this afternoon.

    Friday, June 06, 2008

    Passing the bar

    I've been deconstructing the humble bar increase lately. I'm talking about the one where you knit the front leg of a stitch without removing it from the left needle, then knit the back leg. The stitch you're working into gets a half twist, forming a little bump to the left.


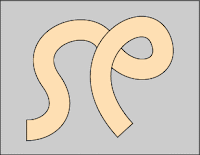
    In this earlier post I described how to work a less-prominent variation on the bar increase. Here's the structural difference between Kf&b and the variant: in the purple figure above, look closely at the twist. The horizontal-ish part lies on top. In the variant, the vertical-ish part ends up on top, as in the green figure. That's why the horizontal bump lies to the back of the fabric.

    Once upon a time, I was working on a pair of gloves with bar increases for the thumb gusset, and it bothered me that the increases weren't symmetrical. Yes, I know that if you Choose Wisely which stitches to work Kf&b in, you can make the placement of the bumps symmetrical; but still, they aren't perfect mirror images because there's a bit of distortion to the right of each bump. What I wanted was an increase that is a structural mirror image of Kf&b, with the bump lying to the right, as in the blue figure. So I unvented one.

    Here's how to work the blue increase: remount the stitch left leg nearside. Knit the front leg and remove the stitch from the right needle (so far, you've merely made a twisted knit stitch). With the tip of the left needle, pick up the strand that runs from lower left to upper right of the stitch just removed (it's the top strand of the twist), and knit the back of it.

    It's also possible to work the mirror image of the variant (peach figure), but it's a little more awkward. Knit the back leg and remove the stitch from the right needle (a traditional twisted knit). With the tip of the left needle, pick up the back strand of the twist, and knit the front of it.

    It took me about three days to draw those figures, and I'm all tuckered out, so I'll have to tell you about Pf&b and its friends another day.

    Monday, May 19, 2008

    Seeds of May

    Afghan Sunday was early this month to avoid Memorial Day (a.k.a. "Race Day" in Indiana). Most of the local knitters are behind (except for one who is well ahead of me), so I didn't feature any new blocks this month, but I'll go ahead and share a couple here anyway.

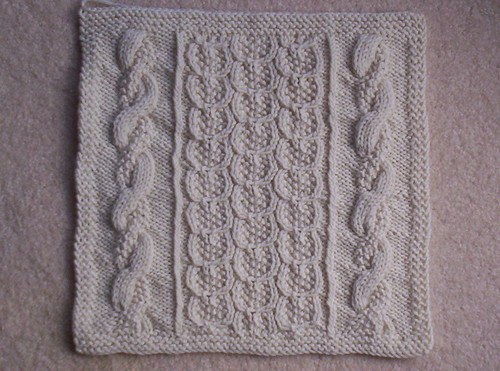
    Isn't the seed stitch pretty on the Ann Strong square?
    Ann Strong square
    This is supposed to be one of the five easiest squares. I kept forgetting to purl through the back loop on the wrong side for the two columns of twisted stitches. I also made a lot of knit vs. purl mistakes on the wrong side rows because of the seed stitch, but they were easy to see and fix on the following row.

    Fidgety business:To feed the consistency hobgoblin, I worked the upper and lower borders on 54 stitches like my other squares worked on #7 needles; I ended the border on a RS row and worked a WS foundation row (last row of each chart). The large side cables ended up due for a twist on the first row of the top border, so I worked some of the decreases as cable decreases. But if I were knitting this square a second time, I would center the side cables vertically instead by working the twists on rows 7 and 17 instead of 5 and 15. It doesn't keep me awake at night the way it is, so I left it. (You think I'm joking? Sadly, I have in fact had knitting-induced sleepless nights.)

    By the way, wrapping up the Sea of Despair socks (literally and figuratively; I gave them to my Mom for Mother's Day) sent me off on a sock-finishing bender. I knit a complete pair of DK-weight Opal stockinette men's socks in four days, finished a toe-up variation of CookieA's Mingus for myself (more on those later), and pulled a pair of diamond-brocaded socks based on a Nancy Bush pattern out of hibernation to finish for my husband:
    Diamond Brocade
    I promise there are two of them, but he was leaving for a business trip just as they finished drying after blocking, so I let him take them before I could get a photo of the pair. He finished teaching his spring semester classes and immediately skipped the country. Maybe he'll model the new socks when he gets back.

    Thursday, May 08, 2008

    A different type of stranded knitting

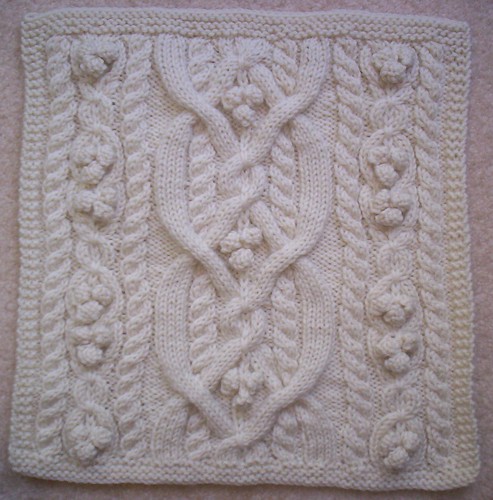
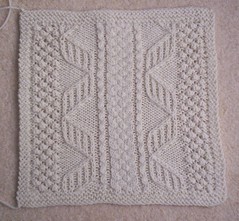
    Here's the second square from April Afghan Sunday. It's the Hanna Burns square, a.k.a. "the DNA square."
    Hanna Burns square

    In the magazine photo of this square, the garter stitch borders clearly flare; and no wonder, since they are worked on 62 stitches with size 8 needles! I worked 48-stitch upper and lower borders, and the square is quite true. The central braid really draws in a lot, so I worked border increases/decreases about every other stitch in that section. Fidgety business: As usual for me, I ended the lower border with a RS increase row, then worked a WS foundation row; I also began the upper border with a RS decrease row, working decreases into cable crossings.

    Some knitters find it confusing that the righthand "DNA strand" (Chart B) begins with Row 1 but the lefthand strand begins with Row 17. The tricky bit, for the spatially challenged, is to realize that when you are working on the wrong side, those positions are reversed. So for the second row of the patterned section, you have to work Row 18 of the chart for the first strand you come to, then work Row 2 for the second strand. Fidgety business: The only time this threw me was when I was working the WS foundation row; I should have worked Row 16 first and then Row 32, but I got them backwards on the first try and had to tink.

    The square was a little narrow before blocking (11 1/4"), so I stopped a bit short in length also (11 1/2") to keep the proportions square, and it wet-blocked to 12" x 12" very nicely.

    The consistency hobgoblin demands that I riff for a while on working all the 1/1 twists in such a manner that no individual stitches end up twisted. Here are my methods:

    1/1 RT: This one is okay as written, but it's hard on my right wrist. I prefer to sl 2 tog kwise, then transfer both sts back to LH needle (this exchanges the positions of the 2 stitches and also changes their mount direction). K1 tbl twice.
    1/1 LT: Sl 1 pwise, Sl 1 kwise, then transfer both sts back to LH needle (this changes the mount direction of the second stitch; otherwise it would get twisted by being worked through the back loop). Now with RH needle behind work, k 2nd st tbl, then k 1st st in front loop.
    1/1 RPT: Also okay as written, but I like to sl 2 tog kwise, transfer both sts back to LH needle (as for the RT), K1 tbl, P1 tbl.
    1/1 LPT: Reverse the mount of the second stitch as for a 1/1 LT. Now with RH needle behind work, p 2nd st tbl, then k 1st st in front loop. (BTW, it's much easier to dig out that purl stitch once it's been turned around, too.)

    One last remark: Those strands aren't actually helixes. They don't spiral, they merely rotate one direction and then the other, because the twists in Row 13 and 29 go opposite directions. If you want them to truly spiral, replace the left twist in Row 29 with a right twist.

    Monday, May 05, 2008

    Out of the Sea

    The Sea of Despair socks are done. (Yes, really done; the ends are actually woven in, not just tucked under for the purpose of photography. Not that I would do such a thing, ahem.)

    Sea of Despair 1

    The only interesting thing about this pair of socks (and its many, many friends) is the heel construction, which is my own. I've designed it to mimic, as accurately as possible, the traditional top-down flap-and-gusset round heel. When I say "as accurately as possible," we're talking viceroy vs. monarch here.

    The foot circumference was 68 sts before beginning the gusset increases. I like mirrored left and right lifted increases for the gussets (the ones where you knit one leg of a stitch in the row below, not the "make 1"s where you knit the running thread between stitches); they look the most like decreases when viewed upside down. I work 12 gusset increase rounds every other round, increasing at each end of the sole stitches.

    The bottom of the sole is a flap shaped exactly like the turning of a round heel. To get started, I mark the center 22 stitches of the sole and knit to the end of them, then turn and purl back to the beginning marker. Then I work in rows, working ssk at the end of each right-side row and p2tog at the end of each wrong-side row, until only 9 stitches remain after finishing a right-side row. I pick up and knit down the left side of the flap, one stitch per row (13 stitches), turn, sl1, purl to last 2 stitches, p2tog, pick up and purl 13 stitches down the other side of the flap. Now there are 34 stitches on the heel needles again, ready to turn.

    The back of the sole is rectangular. It looks like a top-down heel flap, but it's executed with short rows, like turning a top-down square heel. Slipping the first stitch of every row, I just work back and forth on the 34 stitches on the heel needles, working the last stitch of the row together with one of the sole/gusset stitches with ssk or p2tog.

    Now here's some really fidgety business, for complete sock construction junkies only. I don't have high insteps, so a stockinette heel back worked exactly like I just described would be too tall for me. The quick-and-dirty fix for this is to work sssk/p3tog every third pair of rows. I knit a lot of pairs of socks that way. However, gettting even more fidgety, this method also reduces the number of chain stitches down the sides of the heel back, producing a slightly "gathered" appearance which bothered me. So eventually, I figured out how to reduce the number of rows without reducing the number of chain stitches along the sides of the heel back. Every third right side row, after working the ssk, I put the last stitch made back onto the left hand needle and work another ssk. At the end of the next (wrong-side) row, I put the last stitch made back on the left needle and work another p2tog.

    Got a headache now? Go knit something. I know I will.